How to Install Bluebook on Chromebooks
Bluebook runs in kiosk mode, so it’s available only on Chromebooks managed through the Admin console in Google Workspace. After you use the Admin console to install Bluebook in kiosk mode, it will appear on school-managed Chromebooks in the apps menu on the login screen.
Tip: If Bluebook is already installed but verified mode isn’t enabled yet, shorter instructions are available at Enabling Verified Mode.
Before You Start
- Bluebook won’t work unless you follow all required instructions below. Remember to add the extension in addition to the application URL and apply all required settings, including verified mode.
- Check device requirements to make sure your Chromebooks can support testing on Bluebook.
- Go to Accessibility Features in Chromebook Kiosk Mode to learn how to install Bluebook and prepare devices for students who need accessibility features.
- Clear space to avoid loss of student answers and other test day issues. Learn how to clear user profiles.
- Check the network auto-connect setting. If turned on, this setting prevents students from using Bluebook outside your school; they can’t take SAT Weekend at another location, and they can’t take SAT Suite practice tests or try test previews for AP Exams at home. Learn more about the auto-connect setting.
Step-by-Step Instructions
Part 1: Open Apps & Extensions in Your Admin Console
- Use your administrator account to sign in to your Admin console at admin.google.com.
- Open the Devices menu and go to Devices > Chrome > Apps & extensions > Kiosks.
Part 2: Add Application URL and Extension
The steps listed below explain how to add the required application and extension information to your Google Admin console:
- Application URL: https://bluebook-chromebook.app.collegeboard.org
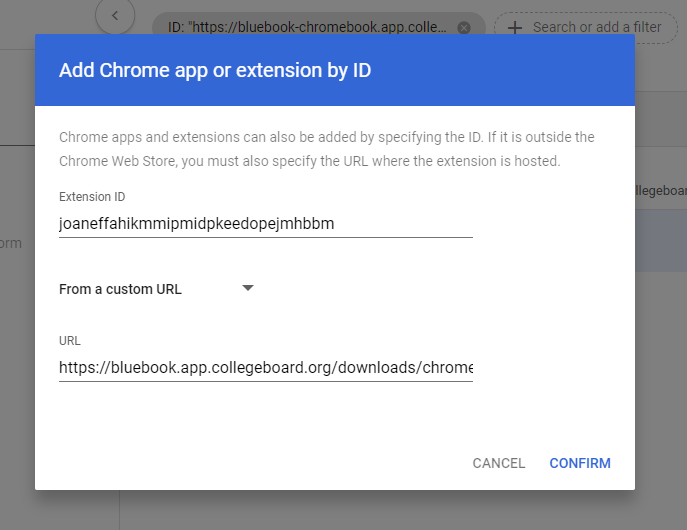
- Extension ID: joaneffahikmmipmidpkeedopejmhbbm
- Extension URL: https://bluebook.app.collegeboard.org/downloads/chromebook-extension/update.xml
- Select the appropriate organizational unit. Get guidance on choosing an organizational unit.
- Hover over the Plus icon and click the Add by URL icon.
- In the Add by URL window, enter the application URL shown above.
- Click Save.
- Enter the extension information by clicking Bluebook in the Apps list to view its kiosk settings.
- Scroll down and click ADD EXTENSION > Add from a custom URL.
- In the window that opens, change the default setting to From a custom URL.
- Add the extension ID and URL shown above.
- Click SAVE in the upper right corner of the screen.
- In the Bluebook panel settings, scroll down and click the caret to expand the extension settings.
- Set the Allow enterprise challenge to enabled.
- Click SAVE in the upper right corner of the screen.
Part 3: Require Verified Mode Boot
To configure verified boot mode in the same organizational unit where Bluebook is installed, take the steps listed below. Learn how to configure it in a higher organizational unit instead.
- Without exiting the organizational unit, go to Devices > Chrome > Settings.
- Click the Device Settings tab at the top of the screen and select Verified mode.
Important: If you don’t see the device settings tab, you might not have the necessary permissions. Contact someone else in your IT department.
- Make sure Inheritance is set to Locally applied.
- Set Configuration to Require verified mode boot for verified access.
- Paste the email below in to the Services with full access field:
- Click Save.
Part 4: Check the Installation
- Open Bluebook on some of your testing devices and click Test Your Device on the sign-in screen to find out if they meet minimum requirements. If you see a checkmark next to Verified Mode, you configured the setting correctly. If you don’t, these troubleshooting tips might help.
- Open Bluebook on a device belonging to any lower organizational units to make sure they inherited the verified mode boot setting. Devices for students with accommodations might be assigned to a lower OU, for example.
- Important: To avoid file corruption, wait a few minutes before closing Bluebook so it can load the extension. Find out how to detect and fix a corrupted file.