Accessibility Features in Chromebook Kiosk Mode
Students with approved accommodations for a screen reader, dictation, magnification, or other assistive technology and accessibility features need the Chromebook floating accessibility menu.
Because Bluebook is a kiosk app, the menu is not available by default and a student’s custom Chromebook settings won’t be applied. Use your Admin console to enable the floating accessibility menu.
Before You Start
- Students approved to use the text-to-speech feature embedded in Bluebook don’t need the floating accessibility menu. Learn more about Bluebook text-to-speech.
- Make sure accessibility features are available only to students approved to use them. Misuse can disrupt testing and lead to retests, makeups, or score cancellations.
- Once enabled, the floating accessibility menu is available to any users on any installed kiosk application, not just Bluebook.
How to Enable Accessibility Features
- Decide how to limit access to the floating accessibility menu. Read about deployment strategy below.
- Select the appropriate organizational unit.
- Go to Devices > Chrome > Settings > Device Settings.
- Change the Kiosk floating accessibility menu setting to show the menu in kiosk mode and click Save.
- Change the Kiosk accessibility shortcuts setting to enable keyboard shortcuts and click Save.
Learn about screen readers and text-to-speech on Chromebooks.
How Students Use Accessibility Features
If your students don’t often test in kiosk mode on a Chromebook, they probably don’t know the essentials. For instance, they need to customize their accessibility settings every time they open Bluebook. Make sure they know how to access, customize, and use accessibility features when they use Bluebook to take a test on a Chromebook. Go to Using Bluebook on Chromebooks.
Deployment Strategy
We recommend using OUs to limit the availability of the floating accessibility menu and accessibility shortcuts because once enabled on a device, anyone can use them on any kiosk application installed on that device.
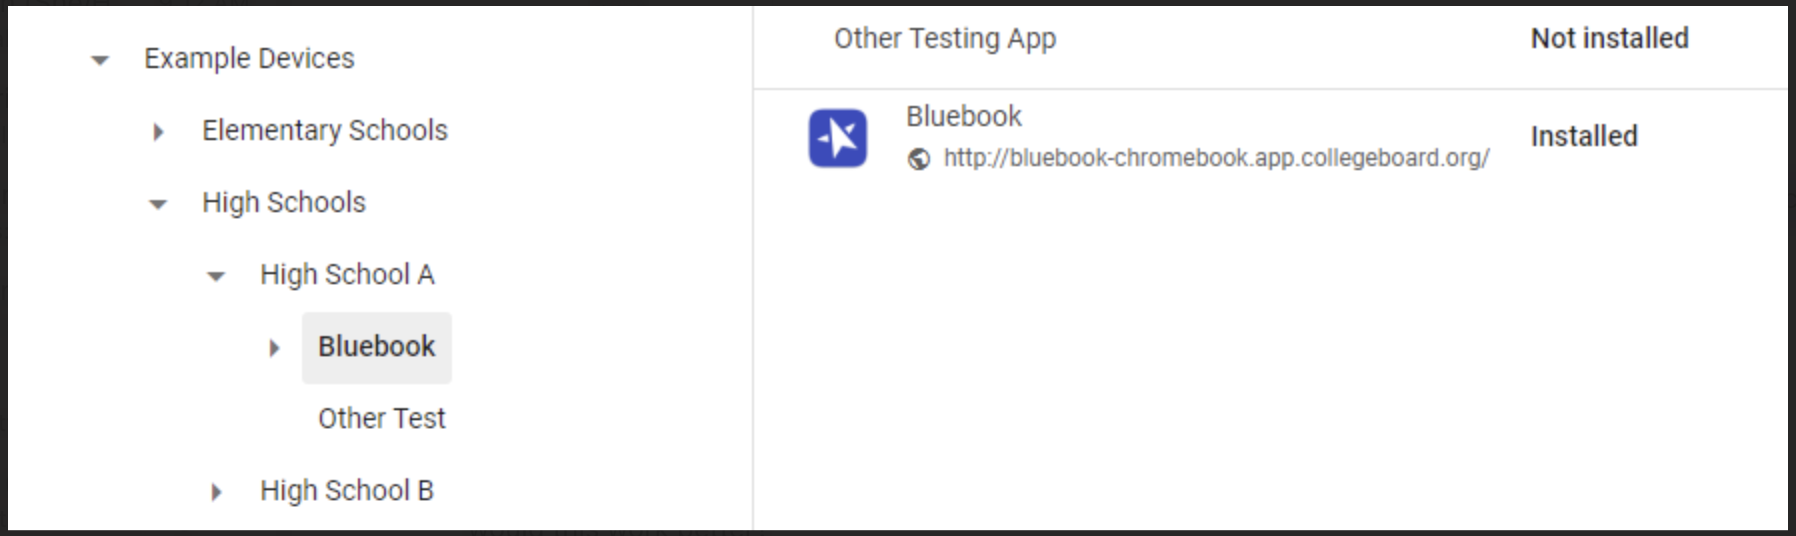
For example, the images below show how High School A uses OUs to make sure only some devices can use accessibility features in kiosk mode, and only on Bluebook. They took these steps:
- They limited the availability of Bluebook by creating a Bluebook OU and deploying the app only to devices within that OU (figure 1).
Then they added an accessibility OU within the Bluebook OU, enabling the floating accessibility menu and accessibility shortcuts for devices assigned to the accessibility subgroup only (figure 2).
Next, they switched the verified mode setting from locally applied to inherited so that verified mode is enabled on these devices.
Finally, they uninstalled the Other Testing App from those devices (figure 3). Note that they used a separate OU for the Other Test so they can uninstall Bluebook from those devices if necessary.
Figure 1
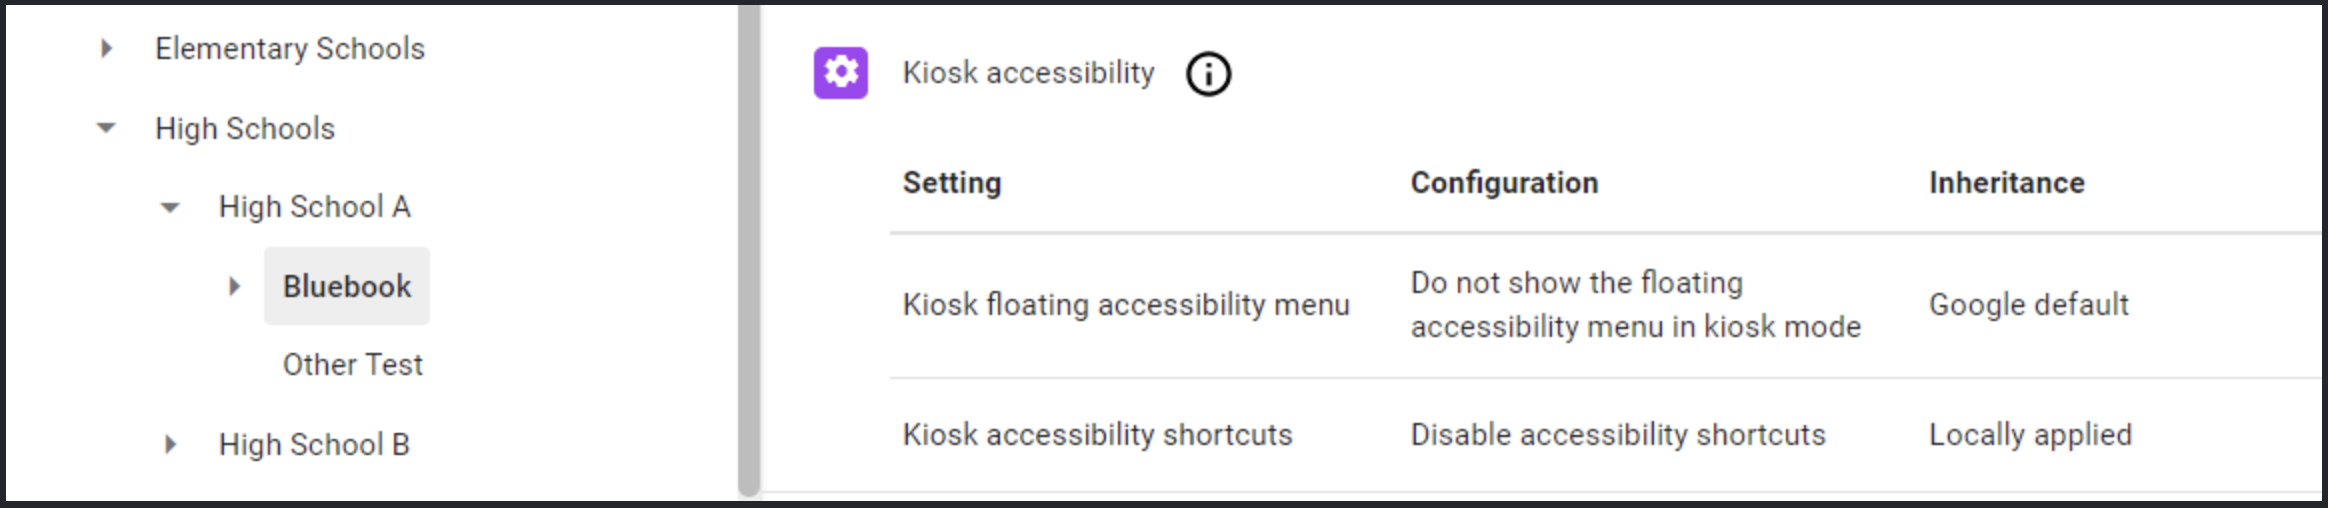
Figure 2
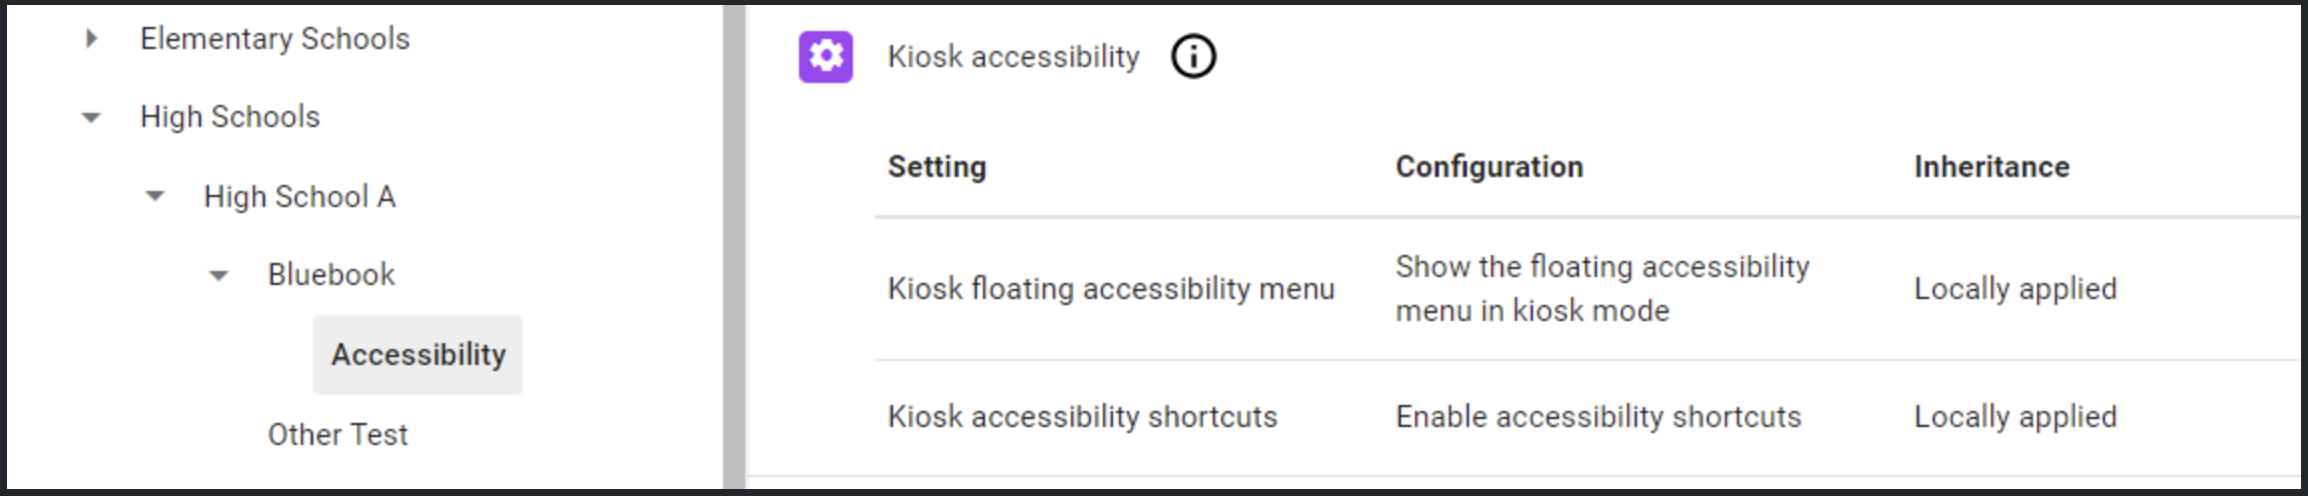
Figure 3