NVDA
Bluebook is designed so students using NVDA can use standard webpage navigation commands. You should open Bluebook on the same device you’ll use for testing and complete a test preview or practice test to confirm your assistive technology settings and workflow. Most exam pages are structured with the following regions. Wherever applicable, you can navigate with these regions/landmarks:
| Regions/Landmarks | Headings |
|---|---|
| Bluebook Controls | Test name |
| Test Timer | Directions |
| Test Tools | E.g., passage title/poem title (when applicable) |
| Passage, Image, or Other Source Content | Prompts for free-response questions (when applicable) |
| Footnotes | Document title for document-based questions (when applicable) |
| Referenced Content | Algorithms and relevant steps (AP Computer Science Principles) |
| Long Description | |
| Question and Answer | |
| Question Number | |
| Answer Options | |
| Question Navigation |
Basic Keyboard Commands for Navigating Bluebook with NVDA
Use the following table for reading and navigating web content inside Bluebook.
Note: The Insert key is the default NVDA modifier key, but Caps Lock can be set as a duplicate modifier key (so that it can be used in place of Insert).
| Task | NVDA command |
|---|---|
| Turn screen reader on | Control + Alt + N |
| Turn screen reader off | Insert + Q |
| Stop reading | Control |
| Read next/previous item | Down Arrow / Up Arrow |
| Read next/previous focusable item (e.g., link, button) | Tab / Shift + Tab |
| Activate link | Enter |
| Activate button | Enter Key or Space Bar |
| Select option | Enter Key or Space Bar |
| Go to next/previous landmark/region | D / Shift + D |
| Go to next/previous heading | H / Shift + H |
| Go to next/previous table | T / Shift + T |
| Navigate table cells | Control + Alt + Arrow Keys |
| Go to next/previous list | L / Shift + L |
| Go to next/previous graphic | G / Shift + G |
| Go to next/previous link | K |
| Show list of all elements (e.g., headings, links, form fields, buttons) | Insert + F7 |
| Virtual cursor | Insert + Space Bar |
Recommended Verbosity and Punctuation Settings
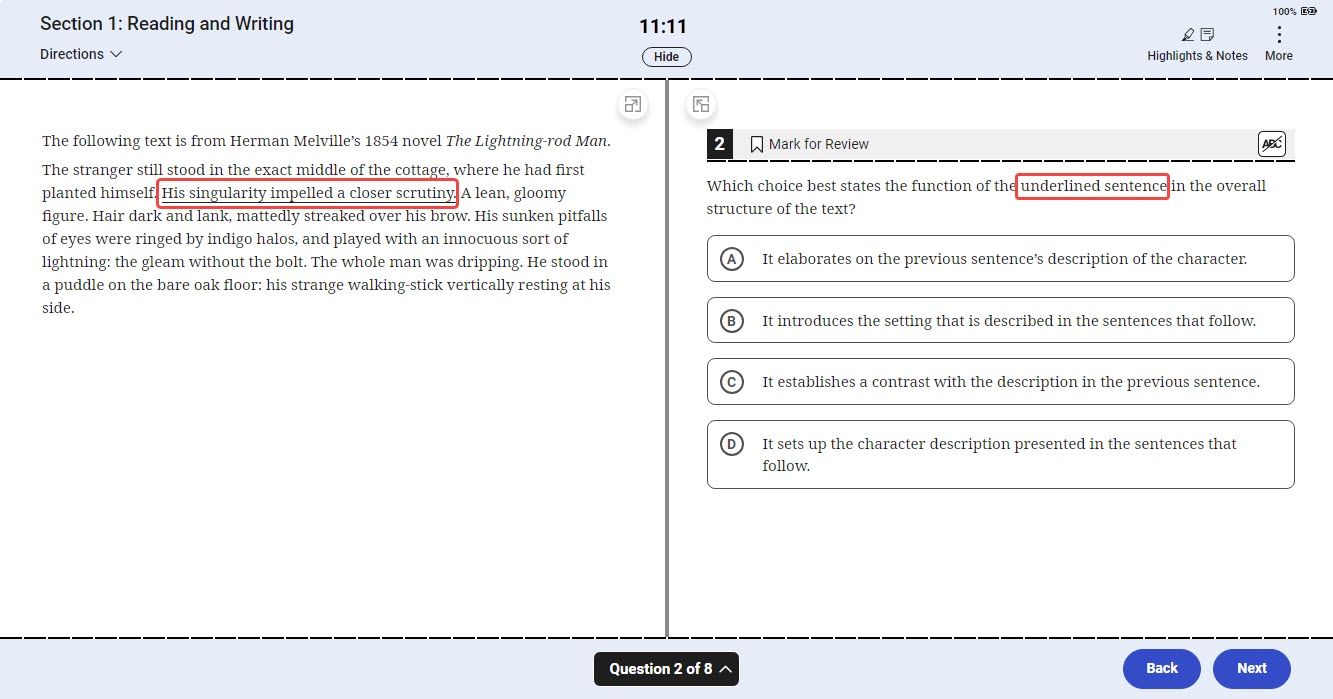
Underlined ”Referenced Content” Text
Some questions within the SAT Reading and Writing section contain underlined text that is the focus of a question. The underlined sentences are structured as landmark regions and are identifiable and navigable with mainstream screen readers like JAWS, NVDA, VoiceOver, ChromeVox, and Narrator.
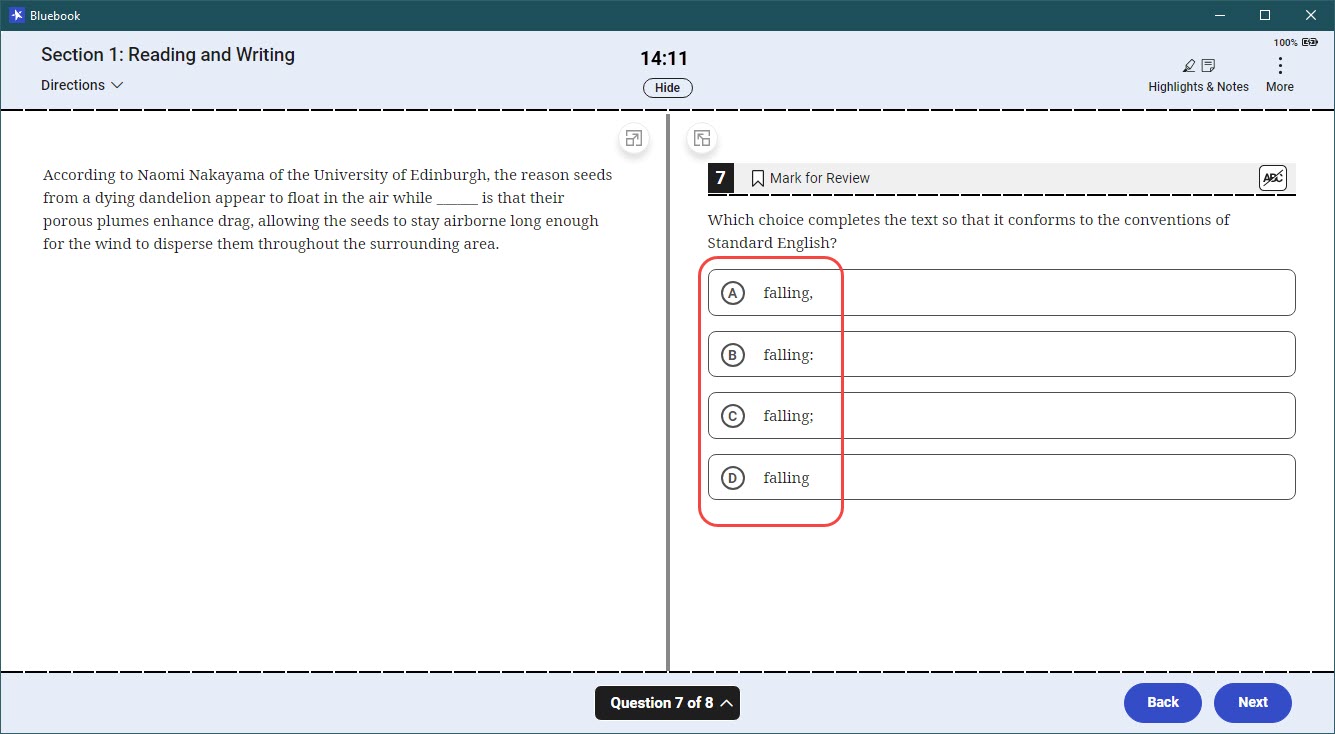
Answer Options with Differing Punctuation
Some questions within the SAT Reading and Writing section contain answer options that have varying punctuation characters. Some mainstream screen readers will not announce these punctuation characters by default. Users of screen readers like JAWS, NVDA, VoiceOver, ChromeVox, and Narrator must ensure that the punctuation settings are set correctly.
Configure the verbosity, punctuation, text processing, and other settings for each digital exam subject as needed. Configuration needs to be done before opening Bluebook to answer preview questions and again before exam day. Configurations must be in place before students begin the check-in process on exam day. On exam day, students won't be able to adjust these settings after entering the start code at the end of the check-in process. Follow these steps below:
NVDA Screen Reader
Adjust the voice profile, speaking rate, verbosity, and punctuation settings before test day.
From the NVDA menu, go to Preferences and Settings (Insert + N > Preferences > Settings)
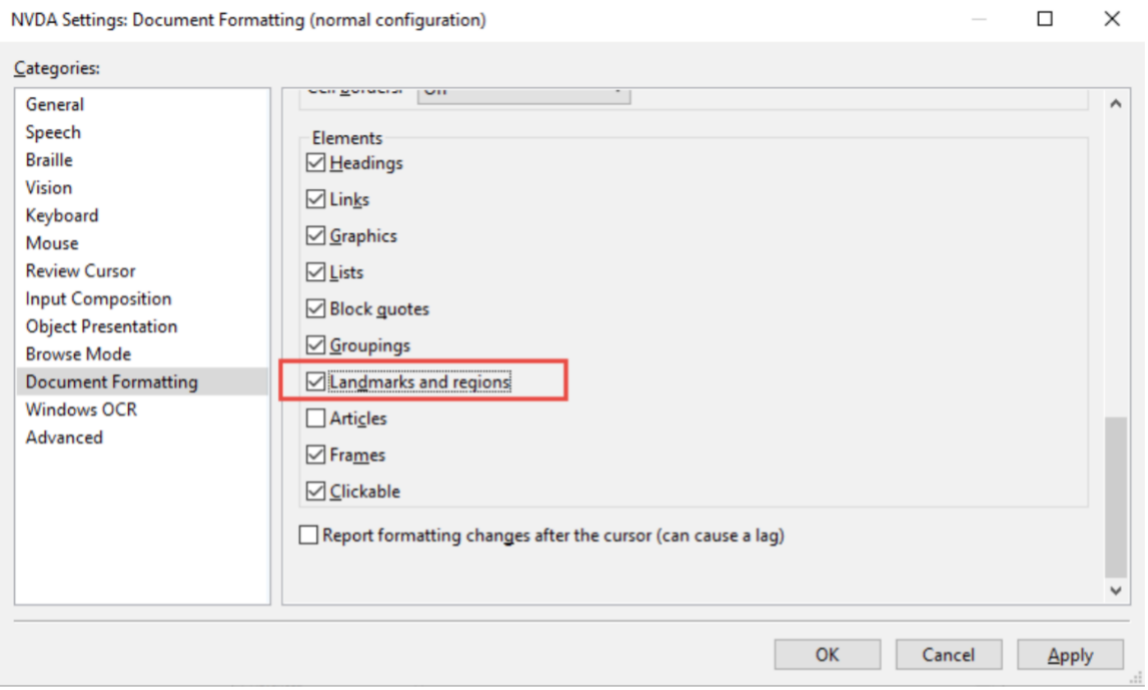
To set landmark and region announcements, choose Document Formatting in the list within the Settings dialog.
Navigate to the Elements group and check (enable) Landmarks and regions.
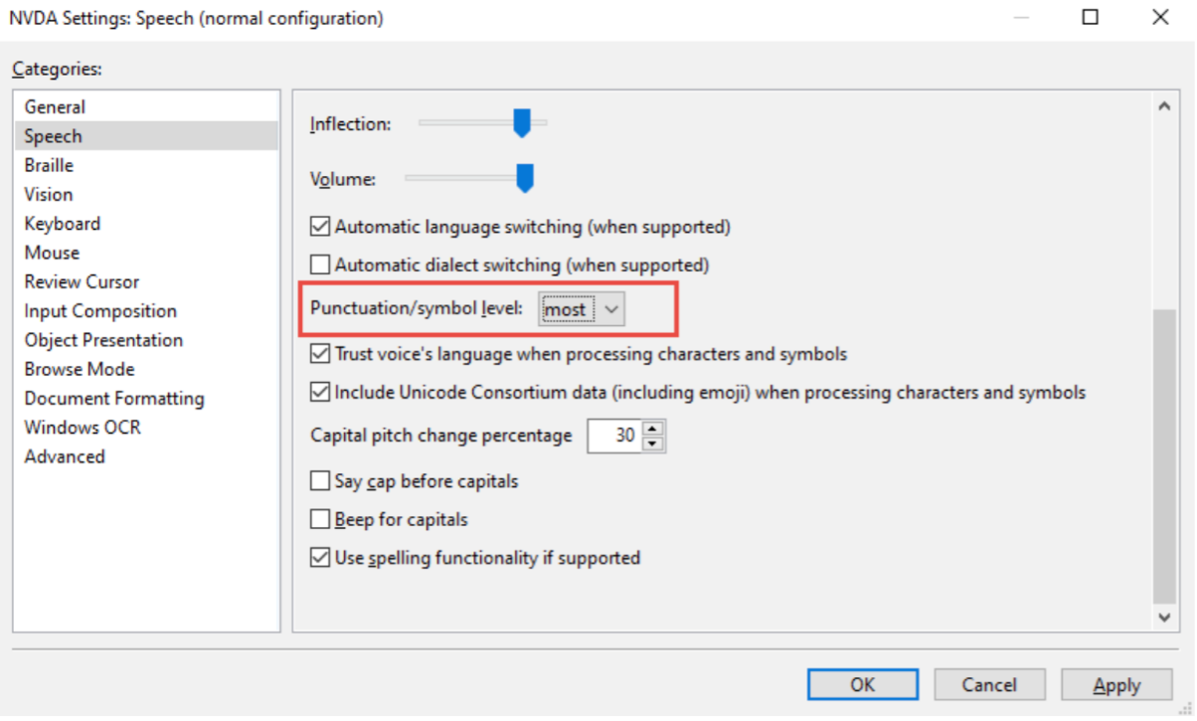
To set Punctuation, choose the Speech category in the list within the Settings dialog.
Navigate to the Punctuation/symbol level combo box.
A higher level of punctuation can be helpful for proofreading and editing.
Some students find a lower level is less distracting for more casual reading.
Alternatively, NVDA users can change punctuation settings without going through Settings by activating the keystrokes Insert + P.
By default, the NVDA screen reader will only announce ellipses (e.g., ”...”) when punctuation settings are set to All. College Board Accessibility Compliance Office (ACO) recommends that NVDA users set the symbol/punctuation level of ellipses to Most.
Symbol punctuation in NVDA can be adjusted to align with the speech punctuation. From the NVDA Settings (Insert + N > Preferences > Punctuation/symbol pronunciation), select Symbols to adjust the level and select an option as appropriate:
Filter by the text ”...”
Navigate to the Level combo box and choose Most.
Either All or Most is recommended for the SAT Reading and Writing section and AP Exams that contain ellipses
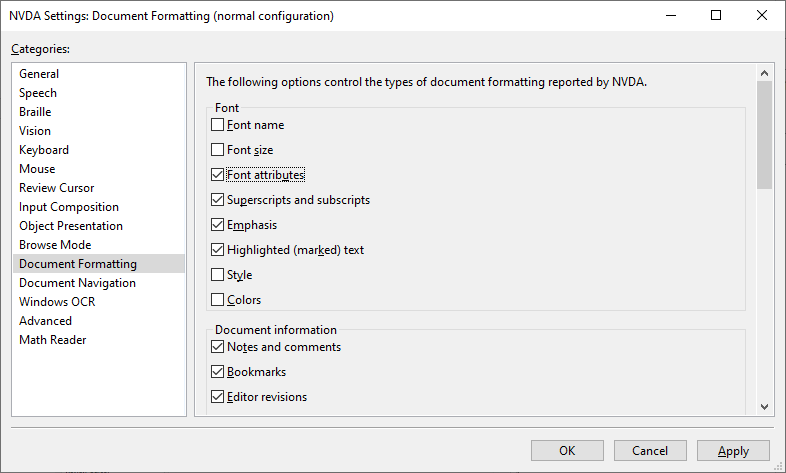
Optional Bluebook Verbosity Settings
Some exam questions have formatted text that's bold, underlined, or italicized, but it's not imperative that the formatting be conveyed to users of screen readers. Nonetheless, the College Board offers the following settings for the following screen readers. These settings are not enabled by default but can be enabled at the user’s discretion so that text formats like bold, underlines, and italics are announced.
The Document Formatting category in the NVDA Settings lets users choose from various font attributes. The Font attributes, Emphasis, and Highlighted (marked text) options are those that the College Board ACO has used when testing the Bluebook application and content like AP English Literature.
To access the Document Format settings, press Insert + N > Preferences > Settings > Document Formatting.
Science, Technology, Engineering, and Mathematics (STEM) Content
Some STEM content within Bluebook exams may contain acronyms, chemical equations, camelCase, or PascalCase that need to be announced clearly or verbatim by screen readers. Below are specific screen reader commands that will announce capital letters distinctly with varying pitch or, depending on the screen reader and operating system, spell out the content character by character.
NVDA Screen Reader
INSERT + Numpad 5 twice quickly.
Move (Drag) Calculator and Reference Sheet with Keyboard
The built-in calculator and reference sheets in Bluebook can be moved with the keyboard. Navigate to the Move (Calculator or Reference) button with the Tab key. Place the Move button into a draggable or pressed state by pressing the Space bar or Enter key.
Users of NVDA must ”pass through” the Space bar or Enter keystrokes to put the button into a pressed state.
Press Insert + Space for focus mode so the Enter or Space keys can put the Move button into a pressed state.
Press Insert + Space again to return to browse mode.
Optimization for Code Sample Readouts (AP Subjects)
Due to the nature of NVDA’s interpretation of language and numbers we suggest using the synthesizer setting, "eSpeak NG" in NVDA when testing for AP subjects including, among others, Career Kickstart Networking Fundamentals, Computer Science Principles, and Computer Science.
To change the synthesizer setting in NVDA open press "NVDA key + N" to open the NVDA menu, then navigate to Preferences > Settings > select Speech category. Navigate to Synthesizer and select Change…” The dialog box, Select Synthesizer, will appear. Select eSpeak NG and OK.
You may also find that the code samples within the test need to read character by character by using the LEFT ARROW and RIGHT ARROW keys. This will ensure that all information is available and provide a better understanding of the code samples presented.